24 Şubat 2013 Pazar

Chocolate: George Washington's Favorite Drink

To contact us Click HERE
Presidents Weekend and what better way to celebrate than with the George Washington's Favorite Drink: Warm Chocolate Cream.

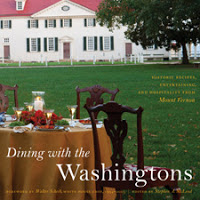
George Washington definitely liked his chocolate. A favorite breakfast for him was cornmeal hoe cakes with honey and butter, washed them down with Warm Chocolate Cream, according to the cookbook, Dining with the Washingtons, by the staff at George Washington's Mount Vernon Estate. The cookbook offers updated versions of typical recipes from the period and a glimpse into the first president's favorite foods.

Dining with the Washingtons, Historic Recipes, Entertaining, and Hospitality from Mount Vernon, edited By Stephen A. McLeod

Chocolate was a favorite drink at Mount Vernon in George Washington's lifetime. Washington's first recorded order for chocolate was for 20 pounds of chocolate, which arrived from England in 1758. He continued to buy chocolate throughout his life, in quantities as small as one pound and as large as the 50 pounds purchased three months before his death in 1799. (Source: Pleasant Living Magazine)

Chocolate was a typical breakfast beverage, not only at Mount Vernon but throughout British North America. It was made by grating a small amount of chocolate into boiling water, milk and water, or wine and water, and later adding sugar (See recipe below from Dining with the Washingtons).

In a letter to his wife in Scotland, tutor John Harrower at Belvidera Plantation wrote that breakfast with his employer usually consisted of warm bread and either coffee or chocolate. In 1794, a friend wrote to George Washington requesting two or three bushels of chocolate shells "such as we've frequently drank Chocolate of at Mt. Vernon, as my Wife thinks it agreed with her better than any other Breakfast....". Martha Washington's daughter-in-law admitted to one of her daughters that "the more simple food I have is best" and went on to say that "I breakfast on Chocolate....".

Special ceramic forms were used to serve this beverage. Among the 309 pieces of white and gold French china acquired in 1790 for the presidential mansion were 12 chocolate cups and saucers, which were brought to Mount Vernon upon Washington's retirement. The Washingtons purchased three sets of tea china and six chocolate cups in 1793, further evidence that chocolate, although popular, was not served as often as tea. A covered, two-handled chocolate or caudle cup, probably intended as a display piece, survives from the "States" service given to Martha Washington in 1796 and is exhibited in the museum at Mount Vernon.

In addition to enjoying cocoa, the Washingtons often made a healthful tea from the shells (hulls), which they served to guests.

Recipe from Dining with the Washingtons:


First Ladies' Chocolate Recipes for Presidents Day

To contact us Click HERE

I posted Martha Washington's Recipe for Devil's Food Cake this weekend, so I thought I should post a few other Chocolate Recipes from other first ladies. The recipes are found in the individual Presidential Archives. Make any of these great recipe and celebrate Presidents Day.
From Mamie Eisenhower (Dwight D. Eisenhower) 
Mamie Eisenhower’s Million Dollar Fudge
* I posted this recipe last year in a slightly different version from the cookbook Politics & Pot Roast **This recipe makes 4 pounds of Fudge**

Ingredients
4 1/2 cups sugar
pinch of salt
2 tablespoons butter
1 tall can evaporated milk
12 ounces semi-sweet chocolate bits
12 ounces German-sweet chocolate
1 pint marshmallow cream
2 cups nutmeats

Directions
Boil the sugar, salt, butter, evaporated milk together for six minutes.
Put chocolate bits and German chocolate, marshmallow cream and nutmeats in a bowl.
Pour the boiling syrup over the ingredients.
Beat until chocolate is all melted, then pour in pan.
Let stand a few hours before cutting.
Remember it is better the second day. Store in tin box.

From Betty Ford (Gerald Ford)
Betty Ford's Chocolate Icebox Dessert

Ingredients
6 Eggs
1 Angel food cake
12 oz Chocolate chips
4 Tbsp Sugar
6 Tbsp Water
2 teaspoon Vanilla
1 teaspoon Salt
2 cups Whipping cream

Directions
Line flat 9x9″ cake pan with wax paper.
Slice angel food cake and place a layer of cake in pan. (Slices easier if frozen). Separate eggs, beat yolks.
Melt chocolate in double boiler over water.
When melted, add sugar and water. Mix well. Make sure sugar melts.
Remove from heat and stir gradually into the beaten egg yolks. Beat until smooth. Cool this mixture. Add vanilla and salt. Mix well.
Beat egg whites until stiff.
Whip the cream.
Fold egg whites into chocolate mix, then the whipped cream.
Place a layer of chocolate on the angel food slices, than another layer of cake, then a layer of chocolate.
Place in refrigerator overnight.
This can be frozen and used later. Be sure to chill overnight before freezing.

From Lady Bird Johnson (LBJ) 
Lady Bird’s Chocolate Nut Drop Cookies


From Hillary Clinton (Bill Clinton)
Hillary Clinton's Chocolate Chip Cookies

Ingredients
Vegetable oil, for baking sheets
1 1/2 cups unsifted all-purpose flour
1 teaspoon salt
1 teaspoon baking soda
1 cup solid vegetable shortening
1 cup (firmly packed) light brown sugar
1/4 cup granulated sugar
1 teaspoon vanilla
2 eggs
2 cups old-fashioned rolled oats
1 package (12-ounce) semi-sweet chocolate chips

Directions
Preheat oven to 350 degrees F. Grease baking sheets with vegetable oil.
Combine flour, salt, and baking soda on waxed paper.
Beat together shortening, sugars, and vanilla in large bowl with an electric mixer until creamy. Add eggs, beating until light and fluffy. Gradually beat in flour mixture and rolled oats. Stir in chocolate chips.
Drop batter by well-rounded teaspoonfuls onto baking sheet. Bake for 8-10 minutes, or until golden.

***
And from Michelle Obama: 
Mama Kaye’s White and Dark Chocolate Chip Cookies

Makes 5 dozen cookiesPrep: 15 minutesBake at 375° for 12 minutes per batch

2 1/4 cups all-purpose flour
1 teaspoon baking soda
1 teaspoon salt
1 cup (2 sticks) unsalted butter, softened
1 stick Crisco butter-flavored solid vegetable shortening
3/4 cup granulated sugar
3/4 cup packed brown sugar
1 teaspoon vanilla extract
2 eggs
1 cup each white chocolate chips, milk chocolate chips and mint chocolate chips (or Andes mint pieces)
2 cups chopped walnuts

1. Heat oven to 375°.
2. Whisk together flour, baking soda and salt in a small bowl. In a large bowl with an electric mixer, cream butter, vegetable shortening, granulated sugar, brown sugar and vanilla extract.
3. Add eggs, 1 at a time, beating well after each addition.
4. On low speed, beat in flour mixture. By hand, stir in white and milk chocolate chips, mint chips and walnuts.
5. Drop rounded tablespoons of dough onto un-greased baking sheets.
6. Bake at 375° for 10 to 12 minutes or until golden brown. Cool on baking sheets for 5 minutes; remove to wire racks to cool completely.

Chocolate Cinnamon Buns: National Sticky Bun Day

To contact us Click HERE
Today is National Sticky Bun Day! I love Cinnamon Buns, and what could be better than Chocolate Sticky Buns! Here's a great vintage Betty Crocker Gold Medal Flour Advertisement and Recipe for Chocolate Cinnamon Buns.

Chocolate Cinnamon Buns

3/4 cup warm water (not hot - 110 to 115 degrees)
1 package active dry yeast
1/4 cup shortening
1 teaspoon salt
1/4 cup sugar
1 egg
1/3 cup cocoa  (use DARK cocoa for richness)
2 and 1/4 cups sifted flour
1 Tablespoon soft butter
1 and 1/2 teaspoons cinnamon
3 Tablespoons sugar
chopped pistachio nuts (or almonds or pecans)

In mixer bowl, dissolve yeast in warm water. Add shortening, salt, sugar, egg, cocoa and 1 cup flour. Beat 2 minutes, medium speed on mixer or 300 vigorous strokes by hand. Scrape sides and bottom of bowl. Stir in remaining flour; blend well. Scrape sides of bowl.

Cover with cloth; let rise in warm place (85 degrees) until double in bulk, about 1 hour. (If kitchen is cool, place dough on rack over bowl of hot water; cover completely with towel.) Stir down by beating 25 strokes. Turn soft dough out on well floured cloth-covered board. Roll into rectangle, 12 x 9". Spread with butter; sprinkle with cinnamon-sugar mixture. Roll up, beginning at wide side. Pinch edge into roll. Cut 12 pieces. Place in greased 9" square pan. Let rise in warm place (85 degrees) until double, about 40 minutes.

Heat oven to 375 degrees (quick mod.). Bake 25 minutes. Remove from pan, frost top immediately with icing (3/4 cup sifted confectioners' sugar moistened with cream or milk to spreading consistency.) Sprinkle with chopped nuts. Serve warm.

A Night at the Oscars: Chocolate Covered Popcorn

To contact us Click HERE
The Academy Awards are tomorrow night. One really needs treats for "A Night at the Movies"! There will be Junior Mints, one of my favorite movie watching candies. I posted a recipe for homemade Junior Mints and Junior Mints Cheesecake the other day. And, of course, there will be Popcorn -- dressed appropriately for the occasion. Here's a simple recipe worthy of Oscar viewing!

You can use dark or white chocolate--or both. Just drizzle some great melted chocolate over your air-popped Popcorn. Drizzle sparingly.

CHOCOLATE COVERED POPCORN

1. Make a bag of popcorn (buttered or plain) and pop it according to the directions. (airpopping!)

2. Put popped popcorn into large bowl or flat baking pan (for more even distribution).

3. Melt dark or white chocolate or both (in separate bowls) in top of double boiler (or in microwave).

4. Drizzle chocolate on popcorn. You can always add more chocolate, but you can't remove it, so use sparingly.

Red Carpet Red Velvet Popcorn & Popcorn Balls for the Academy Awards

To contact us Click HERE
Yesterday I posted a recipe for Chocolate Covered Popcorn--perfect to eat while watching the Academy Awards. Want to take it up a notch?

Here are two recipes for Red Carpet Red Velvet Popcorn and a recipe for Red Carpet Red Velvet Popcorn Balls. 

Roll out the Red Carpet!

 
I. RED CARPET RED VELVET POPCORN

Ingredients
1 cup red velvet cake crumbs  (make your own cake or buy one at the bakery - a few unfrosted cupcakes will do)
2 Tbsp sweet butter
2 Tbsp Madagascar vanilla extract
2 tsp sugar
1/8 tsp salt
8 cups popcorn, popped
1/2 cup white chocolate chips

Directions 
1. Preheat oven to 350.
2.Spread cake crumbs on baking sheet. Bake 8 - 10 minutes until toasted. Cool.
3.Melt butter, vanilla, sugar, salt and mix.
4.Toss popcorn with butter mixture.
5.Microwave white chocolate chips or melt in double boiler; stir until smooth.
6. Drizzle over popcorn until evenly coated.
7. Toss in cake crumbs.

II. RED CARPET RED VELVET POPCORN
Recipe adapted from CassieCraves, adapted from Cookies and Cups

Ingredients
8 cups popped popcorn (1/2 cup unpopped kernels or 2 bags)
3 cups red velvet cake crumbs
12 ounces white chocolate chips
1/2 cup dark chocolate chips

Directions
1. Pour popcorn into large bowl. Melt white chocolate in microwave or double boiler.
2. Pour melted chocolate over popcorn and stir gently to coat completely.
3. Pour popcorn onto waxed paper lined cookie sheets and sprinkle with red velvet crumbs.
4. Melt dark chocolate chips in microwave or double boiler. Using fork, drizzle over popcorn.
5. Let popcorn set completely before eating.

Want to make Red Carpet Red Velvet Popcorn Balls? Here's a recipe adapted from IcyViolet's Kitchen. It's quite heavenly--and very rich.

III. RED CARPET RED VELVET POPCORN BALLS

Ingredients
12 oz white chocolate 
1/4 cup cream cheese
1-1/4 cup
white cake mix

1/4 cup DARK cocoa powder
2 teaspoons red food coloring (or 1/4 tsp red food gel)
1/4 cup corn kernels

1 tablespoon olive oil
1/2 teaspoon sea salt

Directions: 
1. Put 1/4 cup corn kernels in large pot with Tbsp olive oil over medium to medium high heat...they will heat up and start popping. When popping lessens and stops. it's done. Measure out six cups and sprinkle with 1/2 teaspoon salt.
2. Melt white chocolate in microwave or double boiler. Add cream cheese to chocolate and stir until melted.
3. Add cake mix, cocoa, and red food coloring to chocolate mixture and stir.
4. Pour coating onto popcorn and coat evenly.
5. Pour popcorn  onto cookie sheets to cool/harden and shape into popcorn balls

23 Şubat 2013 Cumartesi

Free Blogger Opp: $300 Bloggers' Treat

To contact us Click HERE
blogtreat3o

Bloggers' Treat and $300++ Paypal Cash Giveaway Sign Ups

In exchange for an announcement post and promoting the giveaway, you'll get TWO FREE LINKS (Facebook and Twitter only) on the Rafflecopter..
 Eligibility::* Blog must have Google Page Rank of 2 and up and with Domain Authority of 35 and up ONLY No free-hosted domains please..
* Must be willing to post about the giveaway and promote it at least once a day.
 * Must have an announcement post about the blogger sign-up 
 BIG TREAT FOR BLOGGERS!!!!!!! $250 Cash will be raffled off to all qualified blogs!$100 Cash incentive for the blog/blogger that/who refers the most contest joiners! $300 initial prize for Rafflecopter entries!
Don't forget to tell them that Mom Is Blessed referred you, thanks :)  Click here to signup.Pin It Now!

Zike Review & Giveaway Event

To contact us Click HERE
Here is another fabulous giveaway that I'm excited to be sharing with all my wonderful readers!

Review and Giveaway by: Elitemama

About Zike: Zike LLC is a revolutionary company that is passionate about creating the next generation of revolutionary new human powered products. Their new freestyle hybrid scooters are an innovative combination of both a bicycle and scooter that are unlike others on the planet. Zike is dedicated to commitment and excellence to providing well built, quality products. They hope to have a positive difference on peoples lives by combining fun and fitness with their environmentally friendly transportation. Zike's vision is simply not about being a one hit wonder or a one product success, but a passion for a continual and inventive steps for the future.They strive to "look at things differently". The goal for Zike is to consistently challenge the imagination and to constantly improve Zike's products. They strive daily to be their own best competition!For over 100 years bikes have been a world wide consumer. With 27 patents pending, Zike has pioneered a radical rethink. From meeting the needs of green initiatives to fighting childhood obesity, Zike's vision is leading the was by showing the world a whole new generation of scooters and bikes. Fun, exercise and transportation, Zike is launching a whole new way of looking at the Magic of Motion


My Review: To be honest, we have not had a chance to use the Zike Flyby Scooter yet... After I received the product a couple days later mother nature decided it was time for us to get some snow. What do you expect for Wisconsin, lol. It seems the snow over here is never going to end. If it's not snowing one day, it's raining and then the next thing you know your ice skating all over the sidewalks. 

As you can see, I took a picture of this snow that has prevented us from having a good time with the flyby. If you look close you can also see some chunks of ice in there as well. It's not fun to walk in, trust me. My kids and I have to ice skate to my sons school and back home. There is a lot off falling, tripping and so on and so forth. But, enough about that, lol. Oh, that's another thing, now, I had some pictures of the Zike taken out of the box showing you what it looks like, how many pieces have to be assembled and all, but the phone took some pretty crappy photos so I wasn't able to add those... You do get to see the Zike assemble though.
This is the Zike Flyby Scooter. It was extremely simple to put together. My kids could have done it if they wanted to but I wouldn't let them though, lol. The only thing you have to put on is the front wheel, the handlebar and make some adjustments on the brakes. That's it!! It's simple to assemble. There is no need to fill any tires either so once you have this baby put together, you are ready to roll.

These are a few pictures of what the chain, petals, kick stand and all that other stuff looks like. I did try it out in the basement just to see if everything was adjusted right (and to make sure I didn't screw anything up, lol) and it works great. It did take a bit to get used to. I guess maybe it's because I haven't rode a bike or scooter in over 5 years that I forgot how these things work. Yes, 5+ years... Don't hate, lol. After I got the hang of it it was simple and fun to use for a short period of time because of the limited space the basement has. Here is some information on the Flyby Scooter:
The Flyby is the new cutting-edge phenomenon for kids ages 7 and up.  A step up from the HotShot, the Flyby has a double chain system that can generate higher speeds.  Well-built on a sleek, durable frame, this hybrid scooter takes the traditional scooter experience to a whole new level!  No more pushing and coasting.  It's time to fly!
·         Fast, double-bracket chain system·         9-inch polyurethane tires for less maintenance·         Designed for ages 7 to 10·         Designed for moderate speed and easy pedaling·         Handlebar and shaft detach from the frame in one step for easy storage
Here is a fun video of Zike's products in action:

And now for the moment you have been waiting for. This is the best part! I'm already shaking with excitement =) 
GIVEAWAY!
One lucky reader will win a Zike Flyby Scooter! The retail value for this product is $249.To enter this giveaway you must be 18 years or older, or have your parents permission to enter.Giveaway begins Febuary 21, 2013 and will ends March 7, 2013Open to the US onlyEnter the rafflecopter form below
Mom Is Blessed is not responsible for prize fulfillment.
Best of luck to all who enter!

a Rafflecopter giveawayPin It Now!

Vintage Brownie 'Cresta' Camera

To contact us Click HERE
Hello Friends, I'm so excited to share with you some photos today of my newest edition to my camera collection. Isn't it a sweetheart. I volunteer at the charity shop and was talking about how I love cameras and this one came in. As they knew how much I loved them they saved it especially for me, it was a bargain!As you can see I love it!It's a vintage Brownie 'Cresta' camera by kodak which comes with a very rare flash light! I was in amazement when I saw it. I even got some film to use in the camera, I'm so excited.On another note I have recently been asked if I will start blogging photo tips.So I would like to hear from you what photography tips you would like me to blog about. It could be- Tips on how to take better portrait pictures of people-Inspiration for photo shoots- My favourite Picture editing sites / software-My camera collection- Basic tips on taking pictures- Tips on being creative with props / making props
I have lots of ideas already on how to use light, space and lade-da, but I would love to hear from you! It can be anything to do with photography, cameras and the more the better!Anyway sorry this was a short post, but tomorrow I have a sweet tutorial to share with you! Much Love, Becky ox.{Credit to my mum for taking these photos of me}Photobucket

Sketchbook: Night Owl' & Button Designs

To contact us Click HERE
          Recently in my sketchbook I've been doing drawings of animals, such as owls and         rabbits with a naive look and interesting characterisations. I love owls and gave them feathers for wings and had fun adding character to them. I hope you like them as much as I do.        I drew a quick sketch of a camera inspired by my Brownie 'Cresta' camera and the sketch below was inspired by my little bunny snowbell we used to have.         These pictures are some of the pages and ideas / designs for my ceramic buttons for when I was doing my coursework. As I've moved schools I no longer do ceramics which was one of the subjects I loved most and was doing a course in. You can see, here, here and here about my ceramics and finished outcomes + tutorial.  I explored, patterns textures, shapes, techniques when doing ceramics and it was great fun. Never mind, one day I will do it again. Much Love, Becky ox.Photobucket

I've Moved To A New Blog

To contact us Click HERE
Hey guys I've moved! It's sad to leave this blog but I looking forward to starting a new one called A Dainty Fawn Blog. Thanks for all your support, comments and thank you to my lovely followers. I haven't blogged on my new blog yet but I shall in a couple of days, I already have some cool posts lined up.I will leave this blog up for anyone who wants to look at it but here is the link to my new blog:  http://adaintyfawn.blogspot.co.uk Thank you, I have learnt a lot and have experienced a lot with this blog and I've hoped you've enjoyed it! :)Bye my Yellow Buttercups, Becs x

22 Şubat 2013 Cuma

BodyBlade Classic Review & Giveaway-4 winners!

To contact us Click HERE

I have to be the first to admit it, exercising at home is one of my least favorite activities. I am always looking for new and interesting ways of working out.  So, I was thrilled for the opportunity to try out the Bodyblade® from Mad Dogg Athletics. Mad Dogg Athletics is the world's largest equipment-based education company and the home of Peak Pilates®, Resist-A-Ball® and Bodyblade® brands. 

I received the Bodyblade® Classic Kit to review. If you haven't heard of it yet, let me share with you a little information. 

Product description:


Lightweight & portable-it only weighs 1.5 lbs. 

Lenght-4 ft. 
Variable resistance
15 minutes a day for a complete strength workout
Includes: Bodyblade® Classic, Target Training Express DVD and Exercise Wall Chart.

How does it work?


Bodyblade® is unlike any other piece of exercise equipment on the market today do to the scientific application of low level vibration and inertia. Bodyblade® rapidly changes directions at a rhythm of 4.5 cycles per second, which translates to your body reacting 270 times per minute to resist the forces of the blade moving back and forth.What this means is that your body becomes the machine and the Bodyblade® becomes your exercise partner. The harder you push and pull on the blade, the greater the oscillation or flex in the blade, which requires greater force output from you to neutralize the speed and movement of the blade. You have to start, stop and change directions of your own body while controlling your mass. 
Bottom line: The Bodyblade® is designed to improve strength, balance and coordination.
What did I think?First, I highly recommend that you watch the DVD. It is actually very helpful. It explains exactly how to use the Bodyblade® properly and get the most out of it. 
It feels a little bit awkward at first, until you get the hang of it. Once you get the right grip, and begin to move, the ends start to flex back and forth. It seems a little bit strange at first but when you get the hang of it, it is actually fun. You really have to keep your concentration on your movement, no mindless zoning out like walking on a treadmill in front of the television. The wall chart has 30 different exercises and it details the proper grip, stance and motions. 
I like the time-saving aspect-The suggested amount of time to start out is only 1 minute for each exercise. I started feeling the affects almost immediately. After several exercises I began to sweat. You don't have to do all 30 exercises, The Super Six Exercise Program was designed to work all the major muscle groups. By doing each of the six exercises(chest press, back & should reach, ab crunch, tricep push, bicep/tricep trimmer and the hip & thigh sculptor) for one minute each, you can get a complete workout. As a busy mom, I don't have a lot of time to devote to exercising, but with this program I no longer have any excuses. It it fun, challenging and I really enjoy the workouts! I'm hooked. I have bad knee from a car accident that happened years ago. So, another thing I really like is that it is not a high-impact workout, I don't have to worry about strain and jarring to my knee. That is a huge bonus for me. I also like that it is compact, it easily fits underneath my bed for storage between workouts. 
Buy it: You can purchase this product or browse their entire shop by visiting: www.bodyblade.com. Right now, Mom Is Blessed readers can take an additional $10 off the Bodyblade® Classic Kit by using this code: BBLOG10. 
Connect: You can connect with Bodyblade® on Facebook, Twitter and Pinterest. 
Win: 4 lucky Mom Is Blessed readers will each win 1 of their very own Bodyblade® Classic Kits(unit price $99). Just follow the simple Rafflecopter instructions below to enter to win. Open to U.S. residents only; must be 18+. Mom Is Blessed is not responsible for prize fulfillment. Best of luck to all who enter!

a Rafflecopter giveaway

*I received the Bodyblade® Classic Kit for review purposes. I was not monetarily compensated. The opinions stated within this post are entirely my own. 


Pin It Now!

Vintage Brownie 'Cresta' Camera

To contact us Click HERE
Hello Friends, I'm so excited to share with you some photos today of my newest edition to my camera collection. Isn't it a sweetheart. I volunteer at the charity shop and was talking about how I love cameras and this one came in. As they knew how much I loved them they saved it especially for me, it was a bargain!As you can see I love it!It's a vintage Brownie 'Cresta' camera by kodak which comes with a very rare flash light! I was in amazement when I saw it. I even got some film to use in the camera, I'm so excited.On another note I have recently been asked if I will start blogging photo tips.So I would like to hear from you what photography tips you would like me to blog about. It could be- Tips on how to take better portrait pictures of people-Inspiration for photo shoots- My favourite Picture editing sites / software-My camera collection- Basic tips on taking pictures- Tips on being creative with props / making props
I have lots of ideas already on how to use light, space and lade-da, but I would love to hear from you! It can be anything to do with photography, cameras and the more the better!Anyway sorry this was a short post, but tomorrow I have a sweet tutorial to share with you! Much Love, Becky ox.{Credit to my mum for taking these photos of me}Photobucket

Sketchbook: Night Owl' & Button Designs

To contact us Click HERE
          Recently in my sketchbook I've been doing drawings of animals, such as owls and         rabbits with a naive look and interesting characterisations. I love owls and gave them feathers for wings and had fun adding character to them. I hope you like them as much as I do.        I drew a quick sketch of a camera inspired by my Brownie 'Cresta' camera and the sketch below was inspired by my little bunny snowbell we used to have.         These pictures are some of the pages and ideas / designs for my ceramic buttons for when I was doing my coursework. As I've moved schools I no longer do ceramics which was one of the subjects I loved most and was doing a course in. You can see, here, here and here about my ceramics and finished outcomes + tutorial.  I explored, patterns textures, shapes, techniques when doing ceramics and it was great fun. Never mind, one day I will do it again. Much Love, Becky ox.Photobucket