13 Ekim 2012 Cumartesi

Pineapple-Pecan Chicken Salad

To contact us Click HERE

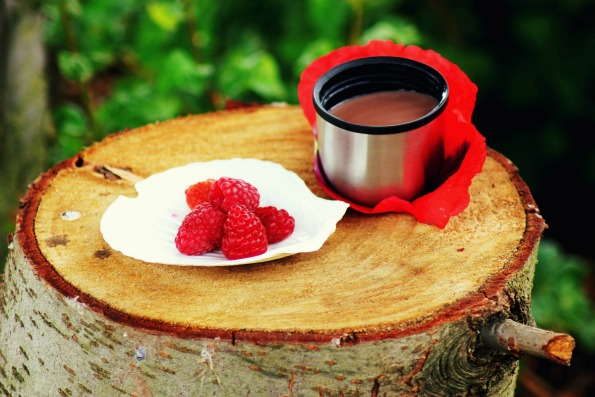
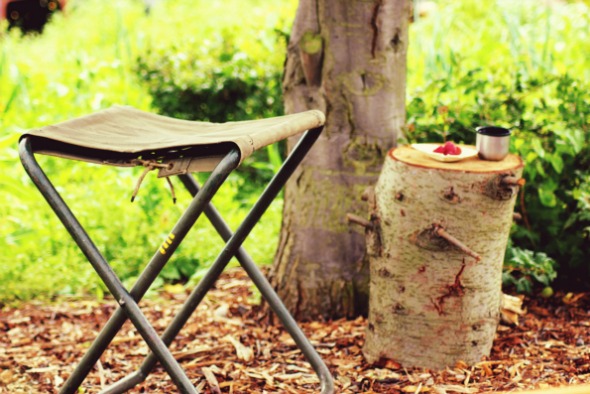
I'm baaaaaack!  I've been unplugged for almost a week now, spending some time at the beach with my Mom.  I had a week of two of my favorite things ... the beach, and hanging out with Mom.  We stayed up way too late, drank way too much wine, and had way too much fun.  Well ... strike that last one ... it's not possible to have too much fun, is it?

And the day after I got back from the beach, I headed out on a day trip with some friends to do one of my other favorite things - wine tasting!  Yes, I love me some wine.  (North Carolina has quite the up-and-coming wine region, by the way, with over 100 wineries across the state.  Check 'em out at visitncwine.com.)

So I guess I've been very spoiled this past week.

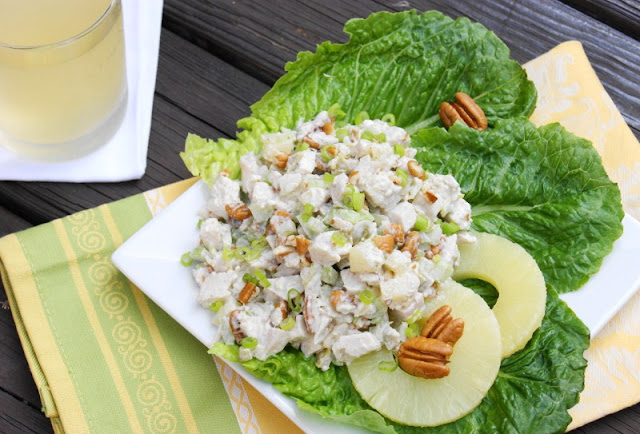
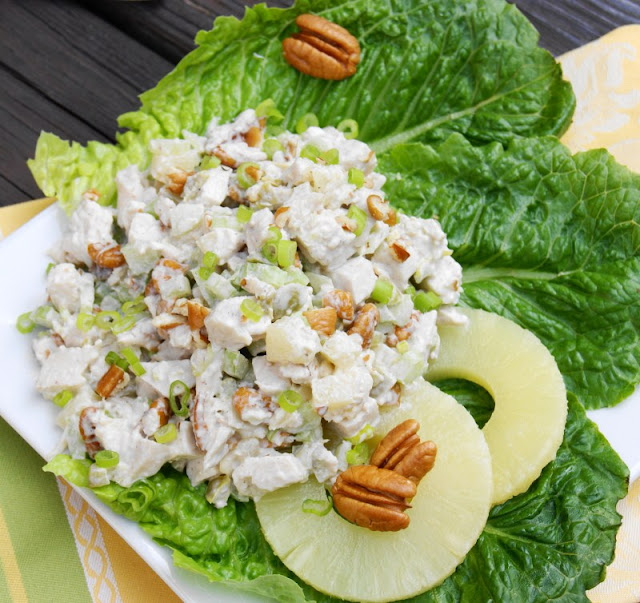
Hmmm, so now I'll spoil myself with one of my favorite chicken salads, this Pineapple-Pecan Chicken Salad.

Chicken salad is one of my favorite lunch foods.  Since I eat it so often, I mix it up with lots of different variations ... you've gotta change it up, right?  This version has such a nice, refreshing flavor with all the pineapple in it.  Just perfect for summer.  Whether it be summer time at the beach, or wine tasting, or any of our other favorite summer things.
I invite you to follow The Kitchen is My Playground with Pinterest, Facebook, Google Friend Connect, Linky Followers, bloglovin', or Feedburner. Buttons are in the right sidebar. I'd love to have you back soon!


Pineapple-Pecan Chicken Salad
Source:  Adapted from Seaboard To Sideboard  by The Junior League of Wilmington, NC

3 c. chopped cooked chicken breasts
1 c. finely chopped celery
2 green onions, sliced (about 3 T.)
2 T. finely chopped green pepper
1 tsp. salt
Dash of black pepper
1/2 c. mayonnaise
1/2 c. chopped pecans
1 (20 oz.) can pineapple tidbits, drained
2 T. lemon juice

Combine chicken, celery, green onion, green pepper, salt, black pepper, and mayonnaise in a bowl; mix well.  Stir in pecans, pineapple, and lemon juice.  Chill for about 30 minutes before serving.

Enjoy!


This post is linked with Sunday Showcase Party, On the Menu Monday, Mangia Mondays, Tuesday Talent Show, Totally Tasty Tuesdays, Cast Party Wednesday, Whatcha Whipped Up, Full Plate Thursday, Sweet Treats & Swanky Stuff Thursday, Foodie Friday, Foodie Friday with Diane Balch, Inspiration Friday, Weekend Potluck, Weekend Wrap-Up Party, Strut Your Stuff Saturday, Scrumptious Sunday, Nifty Thrifty Sunday, Think Pink Sunday, Sundae Scoop.

7 Layer Cookies

To contact us Click HERE

Merry Christmas in July!  My bloggy friend Yvonne at Stone Gable has a Christmas in July party going on right now, and today she posted the most beautiful white poinsettia stockings.  Impressive.  Truly impressive.
While I choose to live in denial that some local stores already have their Christmas decorations out ... I kid you not ... three weeks ago I saw one store putting them out! ... Yvonne's Christmas in July party inspired me to share one of our family's favorite Christmas-time cookies in honor of the occasion.
Now, I say Christmas-time cookies, not simply Christmas cookies, because the beauty of these sweet layer cookies is ... well ... they're not Christmas cookies!  Which means we can all enjoy their layered deliciousness any  time of the year!!It just so happens that 7 Layer Cookies are a staple of my Mother-in-Law's Christmas day cookie tray.


I did not have the pleasure of meeting Mark's Dad.  But the story goes that these were one of his favorite cookies.  It's been told that, several years, Mark's Mom had to make more of these right before Christmas day because Mark's dad had eaten them all!  Ummm-hmmmm ... they're that good.

And they're only 7 ingredients.

Layered in a pan.

That's how they got the name 7 Layer Cookies.

You probably hadn't figured that out, had you??

Now, all snug in the baking pan, these cookies look all innocent, don't they?  But ...


... once you cut into them, their layered awesomeness is revealed!  And layered awesomeness it is.  Truly.  Mark's Dad wouldn't steer us wrong! 


I invite you to follow The Kitchen is My Playground with Pinterest, Facebook, Google Friend Connect, Linky Followers, bloglovin', or Feedburner. Buttons are in the right sidebar. I'd love to have you back soon!


7 Layer Cookies
Source:  My Mother-in-Law

1/2 c. butter
1 1/2 c. graham cracker crumbs
1 c. flaked coconut
1 c. (6 oz.) chocolate chips
1 c. (6 oz.) butterscotch chips
1 (14 oz.) can sweetened condensed milk (fat free works just fine)
1 c. chopped pecans

Melt butter in a 9x13" baking dish.  Add remaining ingredients in layers, in the order listed, sprinkling each ingredient evenly over the previous layer.

Bake at 325 degrees for about 30 minutes.  Let cool completely in the baking dish.  Cut into small squares.

Enjoy!


This post is linked with Cast Party Wednesday, Whatcha Whipped Up, Full Plate Thursday, Sweet Treats & Swanky Stuff Thursday, Foodie Friday, Foodie Friday with Diane Balch, Inspiration Friday, Weekend Potluck, Weekend Bloggy Reading, Weekend Wrap-Up Party, Strut Your Stuff Saturday, Sweets for a Saturday, Scrumptious Sunday, Nifty Thrifty Sunday, Think Pink Sunday, Sundae Scoop, Sunday Showcase Party, On the Menu Monday, Mangia Mondays, Crazy Sweet Tuesday, Totally Tasty Tuesdays, Tuesday Talent Show, Share Your Creations, Pin It Thursday.

Lavender & Honey Balsamic Vinaigrette

To contact us Click HERE

Well, I'm continuing my experiments in cooking with lavender, and my second experiment did not disappoint.  Just as in the lavender lemonade, I really enjoyed the fragrant, floral notes of the lavender in this Lavender & Honey Balsamic Vinaigrette.  I guess I'm a fan of the flavor of lavender!

And being an assistant beekeeper to my beekeeper hubby, I'm always on the lookout for new recipes in which to use our honey harvest.  So how could I resist trying out the lavender and honey combination of this balsamic vinaigrette?  I couldn't.


I also did a little experiment within my lavender experiment.  I wanted to see just what the dried lavender 'brought to the party,' so to speak, in this dressing ... how much flavor it imparted, etc.  So I decided to make the exact same dressing ~ minus the lavender ~ to see. 

Well, let me just say ... the lavender brings a lot  to this dressing party!  In comparing the two, I actually wasn't a fan of the lavender-less version after tasting the lavender-infused one.  (But you all know me, I'll keep working with the lavender-less version to tweak the ingredient proportions ... 'cause I think a honey-balsamic vinaigrette dressing would be wonderful).

Served with a very simple salad, the lavender in this dressing really shines through! 

Have you experimented with cooking with lavender?  I'd love to hear your favorites.

 I invite you to follow The Kitchen is My Playground with Pinterest, Facebook, Google Friend Connect, Linky Followers, bloglovin', or Feedburner. Buttons are in the right sidebar. I'd love to have you back soon!


Lavender & Honey Balsamic Vinaigrette
Source:  Adapted from A Taste of Lavender: Culinary Delights from Mountain Farm compiled by Linda Thompson & Marilyn Cade

6 T. extra virgin olive oil
2 T. balsamic vinegar
2 T. honey
1 T. fresh lemon juice
1 garlic clove, crushed
1 tsp. coarse grain mustard
1 tsp. dried lavender flowers

Whisk all ingredients together.  Let stand for 30 minutes to allow the flavors to meld together.  Whisk again and serve.  Store in a container with a tight lid in the refrigerator for up to a week.

Enjoy!


This post is linked with Sunday Showcase Party, On the Menu Monday, Mangia Mondays, Totally Tasty Tuesdays, Tuesday Talent Show, Whacha Whipped Up Wednesday, Cast Party Wednesday, Share Your Creations, Pin It Thursday, Sweet Treats & Swanky Stuff, Foodie Friday, Inspiration Friday, Weekend Potluck, Weekend Wrap Up Party, Strut Your Stuff Saturday, Nifty Thrifty Sunday, Think Pink Sunday, Sundae Scoop.

'Gettin' Figgy With It' Fig Pizza

To contact us Click HERE

My recent bounty of fresh figs is serving up some delicious treats in our kitchen.  First, marinated fig salad, and now ... fig pizza!  This pizza was so good, Mark created three new words to describe it.
Yup, he described this pizza as figtitious, figilicious, and figtastic.  That's pretty high praise ... I think.  But let's turn to Mark's definitions to make sure.
Figtitious - So good it can't be real.  (Like 'fictitious' ... get it?)
Figilicious - Figs that are super delicious.
Figtastic - Fantastic figs.
I'd say yes, that's high praise.  Wouldn't you?
And apparently Mark is in a creative mood ... 'cause he just said the title of this post needed to be 'Gettin' Figgy With It.'  Okay.  I'm good with going with his creative juices tonight.
To get started on this figtitious, figilicious, figtastic fig pizza, gather up some gorgeous fresh figs and slice them in half.


Then slice a red onion into rings, season the rings with salt and pepper, ...

... and saute them up in a little olive oil.


Then gather up some fresh rosemary.


Top pizza dough with a simple drizzling of olive oil, then arrange the onions and figs on top, and sprinkle with a bit of fresh rosemary.


Finally, top with some little chunks of cheese.  Mark and I decided to test two types of cheese - fresh mozzarella and goat cheese.  So, half our pizza was topped with crumbles of goat cheese, and half had fresh mozzarella chunks.

Taste test results?  Both were great!  I liked goat cheese a little better, and Mark liked fresh mozzarella best.


Bake it up, serve yourself a big ol' piece, and enjoy the beautiful figliciousness.   

I invite you to follow The Kitchen is My Playground with Pinterest, Facebook, Google Friend Connect, Linky Followers, bloglovin', or Feedburner. Buttons are in the right sidebar. I'd love to have you back soon!


Fig PizzaSource:  Inspired by Southern Living's Figgy Focaccia, August 2012
Pizza dough (homemade* or store-bought dough ball)1 medium red onion, sliced in ringsSalt & pepperExtra virgin olive oil16 or so fresh figs, halvedAbout 1 T. fresh rosemary leaves8 oz. goat cheese, crumbled or fresh mozzarella, sliced
Sprinkle onion rings with a little salt and pepper.  Heat about a tablespoon of olive oil in a saute pan; saute onions until tender, about 3 to 4 minutes per side.
Roll pizza dough out to desired size; place on preheated pizza stone or baking sheet. Spread a thin layer of olive oil over the crust.  Arrange onions and figs on top of the crust, sprinkle with rosemary, and then top with cheese. Bake at 425 degrees for about 15-20 minutes, or until crust is cooked through and cheese is just beginning to brown.
* See my homemade whole wheat pizza dough recipe, if you'd like.
Enjoy!

This post is linked with Tuesday Talent Show, Totally Tasty Tuesdays, Cast Party Wednesday, Whatcha Whipped Up, Full Plate Thursday, Pin It Thursday, Share Your Creations, Sweet Treats & Swanky Stuff, Inspiration Friday, Foodie Friday, Weekend Bloggy Reading, Weekend Potluck, Foodie Friday with Diane Balch, Weekend Wrap Up Party, Strut Your Stuff Saturday, Sundae Scoop, Think Pink Sunday, Nifty Thrifty Sunday, Scrumptious Sunday, Overflowing with Creativity, On the Menu Monday.

Nutella Waffles {& two blog milestones!}

To contact us Click HERE


It's been a big couple of weeks here at The Kitchen is My Playground, with this little slice of blogland reaching two pretty cool milestones.  At least I think they're pretty cool!

So what are these cool milestones, you ask?  Well, please allow me to share ...

1.  Last week, The Kitchen is My Playground hit the 1,000 Facebook followers mark!  Thank you soooooo much to all the site's Facebook followers ... and to all followers through other following ways, too.  I so appreciate each and every one of you. 

(And now for a totally shameless, self-promotion plug ... if you're not a follower already, I'd love to have you as one!  I invite you to follow The Kitchen is My Playground by Pinterest, Facebook, Google Friend Connect, Linky Followers, bloglovin', or Feedburner.  Pretty please with sugar on top? ... You'll put a big smile on my face!)

2.  Drum roll please   ...   TODAY, yes, just this very day,    ...   The Kitchen is My Playground received its 1 millionth pageview!!!!!  Mmmmm, hmmmm ... 1 million ... 1,000,852 to be exact.  Now, I know in the huge world of blogland that this is still a small blog, but I'm really excited about 1 million views!  Thank you, thank you, thank you a million thank you's to all the readers out there.  I'm so touched and humbled by this milestone.


To celebrate, I decided to share these yummy Nutella waffles.  Now, I love mine topped with some fruit and drizzled with pure Vermont maple syrup ...


But if that's not enough of a 1,000,000th pageview celebration for ya, then how about a Nutella Waffle Sundae?


Take a warm Nutella Waffle, scoop on vanilla ice cream, drizzle it with some warmed Nutella, and plop a cherry on top.  Then dig on in to my kind of sundae!


Thank you, readers, for putting a smile on my bloggy face each day!  My hope is that my kitchen adventures put a little smile on your face in return.

(Pssssstt! ... now go make these waffles.  You deserve them.)


I invite you to follow The Kitchen is My Playground with Pinterest, Facebook, Google Friend Connect, Linky Followers, bloglovin', or Feedburner. Buttons are in the right sidebar. I'd love to have you back soon!


Nutella Waffles
Source:  Adapted from my Mom's Sour Cream Waffles

3 eggs, separated
1/2 c. milk
1/2 c. butter, melted
1 tsp. vanilla extract
3/4 c. Nutella
1 1/2 c. flour
2 tsp. baking powder
1/2 tsp. baking soda
1/2 tsp. salt

Beat the egg yolks in a large bowl until they turn pale yellow in color.  Beat in milk, melted butter, vanilla extract, and Nutella.  Combine flour, baking powder, baking soda, and salt; add to egg yolk mixture and beat well.

In a clean bowl, beat egg whites until stiff.  Carefully fold into batter until well combined.

Cook in a waffle maker according to maufacturer's directions.  (I use a Belgium waffle maker for big, thick waffles.)

Makes approximately 12 waffles, depending on the size of your waffle maker.

Enjoy!


This post is linked with Weekend Bloggy Reading, Weekend Potluck, Foodie Friday with Diane Balch, Friday Fun Party, Strut Your Stuff Saturday, Sweets for a Saturday.

12 Ekim 2012 Cuma

Be back soon.

To contact us Click HERE
 Hello friends, I haven't been blogging for a while as my life as jolted to a stand still. A couple of things, important things have happened in my life recently and so I thought it was best to take a break, rest and think about life. You may not know but there is someone close to my heart who is not particularly very well at the moment and I've not had the time to blog. But I will be back soon and I thought I would let you know about my sudden non-appearance. I hope all is well Love Becky ox.

Recipe: Cute Biscuit Lollies

To contact us Click HERE
Hey, I'm back, things have got slightly better and we have been relaxing down at the allotment, I have so much to share with you but for now enjoy this recipe. From my birthday I have a great recipe on how to make biscuit lollies that are super cute. The recipe is an adjustment of a Nigella Lawson recipe. They taste fantastic and look just like swirly lollies. So you could make them for a party or just to cheer someone up! Ingredients:175g unsalted butter / 200g Sugar / 2 Large eggs / 425g of plain flour / 1tsp of salt / 1 tsp of / baking powder / Pink IcingMaterials:Piping bag / circle cookie cutter / Lolly cooking sticks
{Preheat oven to 180c}
    1.Cream butter and sugar together, then beat in eggs and vanilla. 2. In another bowl add together the flour, salt & baking powder. 3. Add to the wet ingredients. 4. If mixture is to sticky then add extra flour sparingly, then half, wrap both dough balls in cling film and leave in fridge for 1 hour. 5. Cover surface with flour and roll out doll to 0.5cm thickness, cut out circle shapes. 6. Line trays with greasproof paper and place the cookies on to them, place lolly sticks on top as shown below and cover the back with a little dough. 7. Place in oven for 8-12 mins.
8. Take out of the oven, leave to cool then ice with pink icing in a swirly pattern.There you have delightfully sweet lolly biscuits. I hope you've enjoyed this cute recipe which is great for parties and celebrations and I hope you enjoy that I'm back again. I have many sweet photos and adventures to share with you so I hope to see you soon. Love Becky ox

Adventures: Today is Calm :: & Fun

To contact us Click HERE
For relaxation purposes we visited the allotment on Saturday which was a whole lot of fun. I took lots of photos, picked raspberries and flowers, drank hot chocolate and drew drawings under the plum tree. We even have a log which has become a makeshift coffee table & seat, it's so cute don't you think! I love being surrounded my flowers and greenery and capturing objects blowing in the wind as shown above in the picture. The lace looks like a dream and is actually used to keep birds off of the fruit, it's a pretty way to do so!I have also recently became the owner of a beautiful Chinese umbrella with lovely paintings of colourful birds, I can't wait to use it in more photo shoots! This reminds we that in the summer my sister is walking The Great Wall Of China for charity, what a great sport she is!I love drawing at the allotment and these are the results. My friend taught me how to draw cartoon eyes and ever since I've been practising drawings of comical women. My favourite is the 'Hippy' and the lady in the green square patterned top. I love drawing and I find this a great way to enhance my skills.Thank you for reading and I hope to see you again as I have so much to share! I'm off now to bake nutty cookies, wish me luck! Becky ox